Major project
Accurate Positioning Of The Femoral Prosthesis During Hip Replacement Surgery
PRECISION Hip System
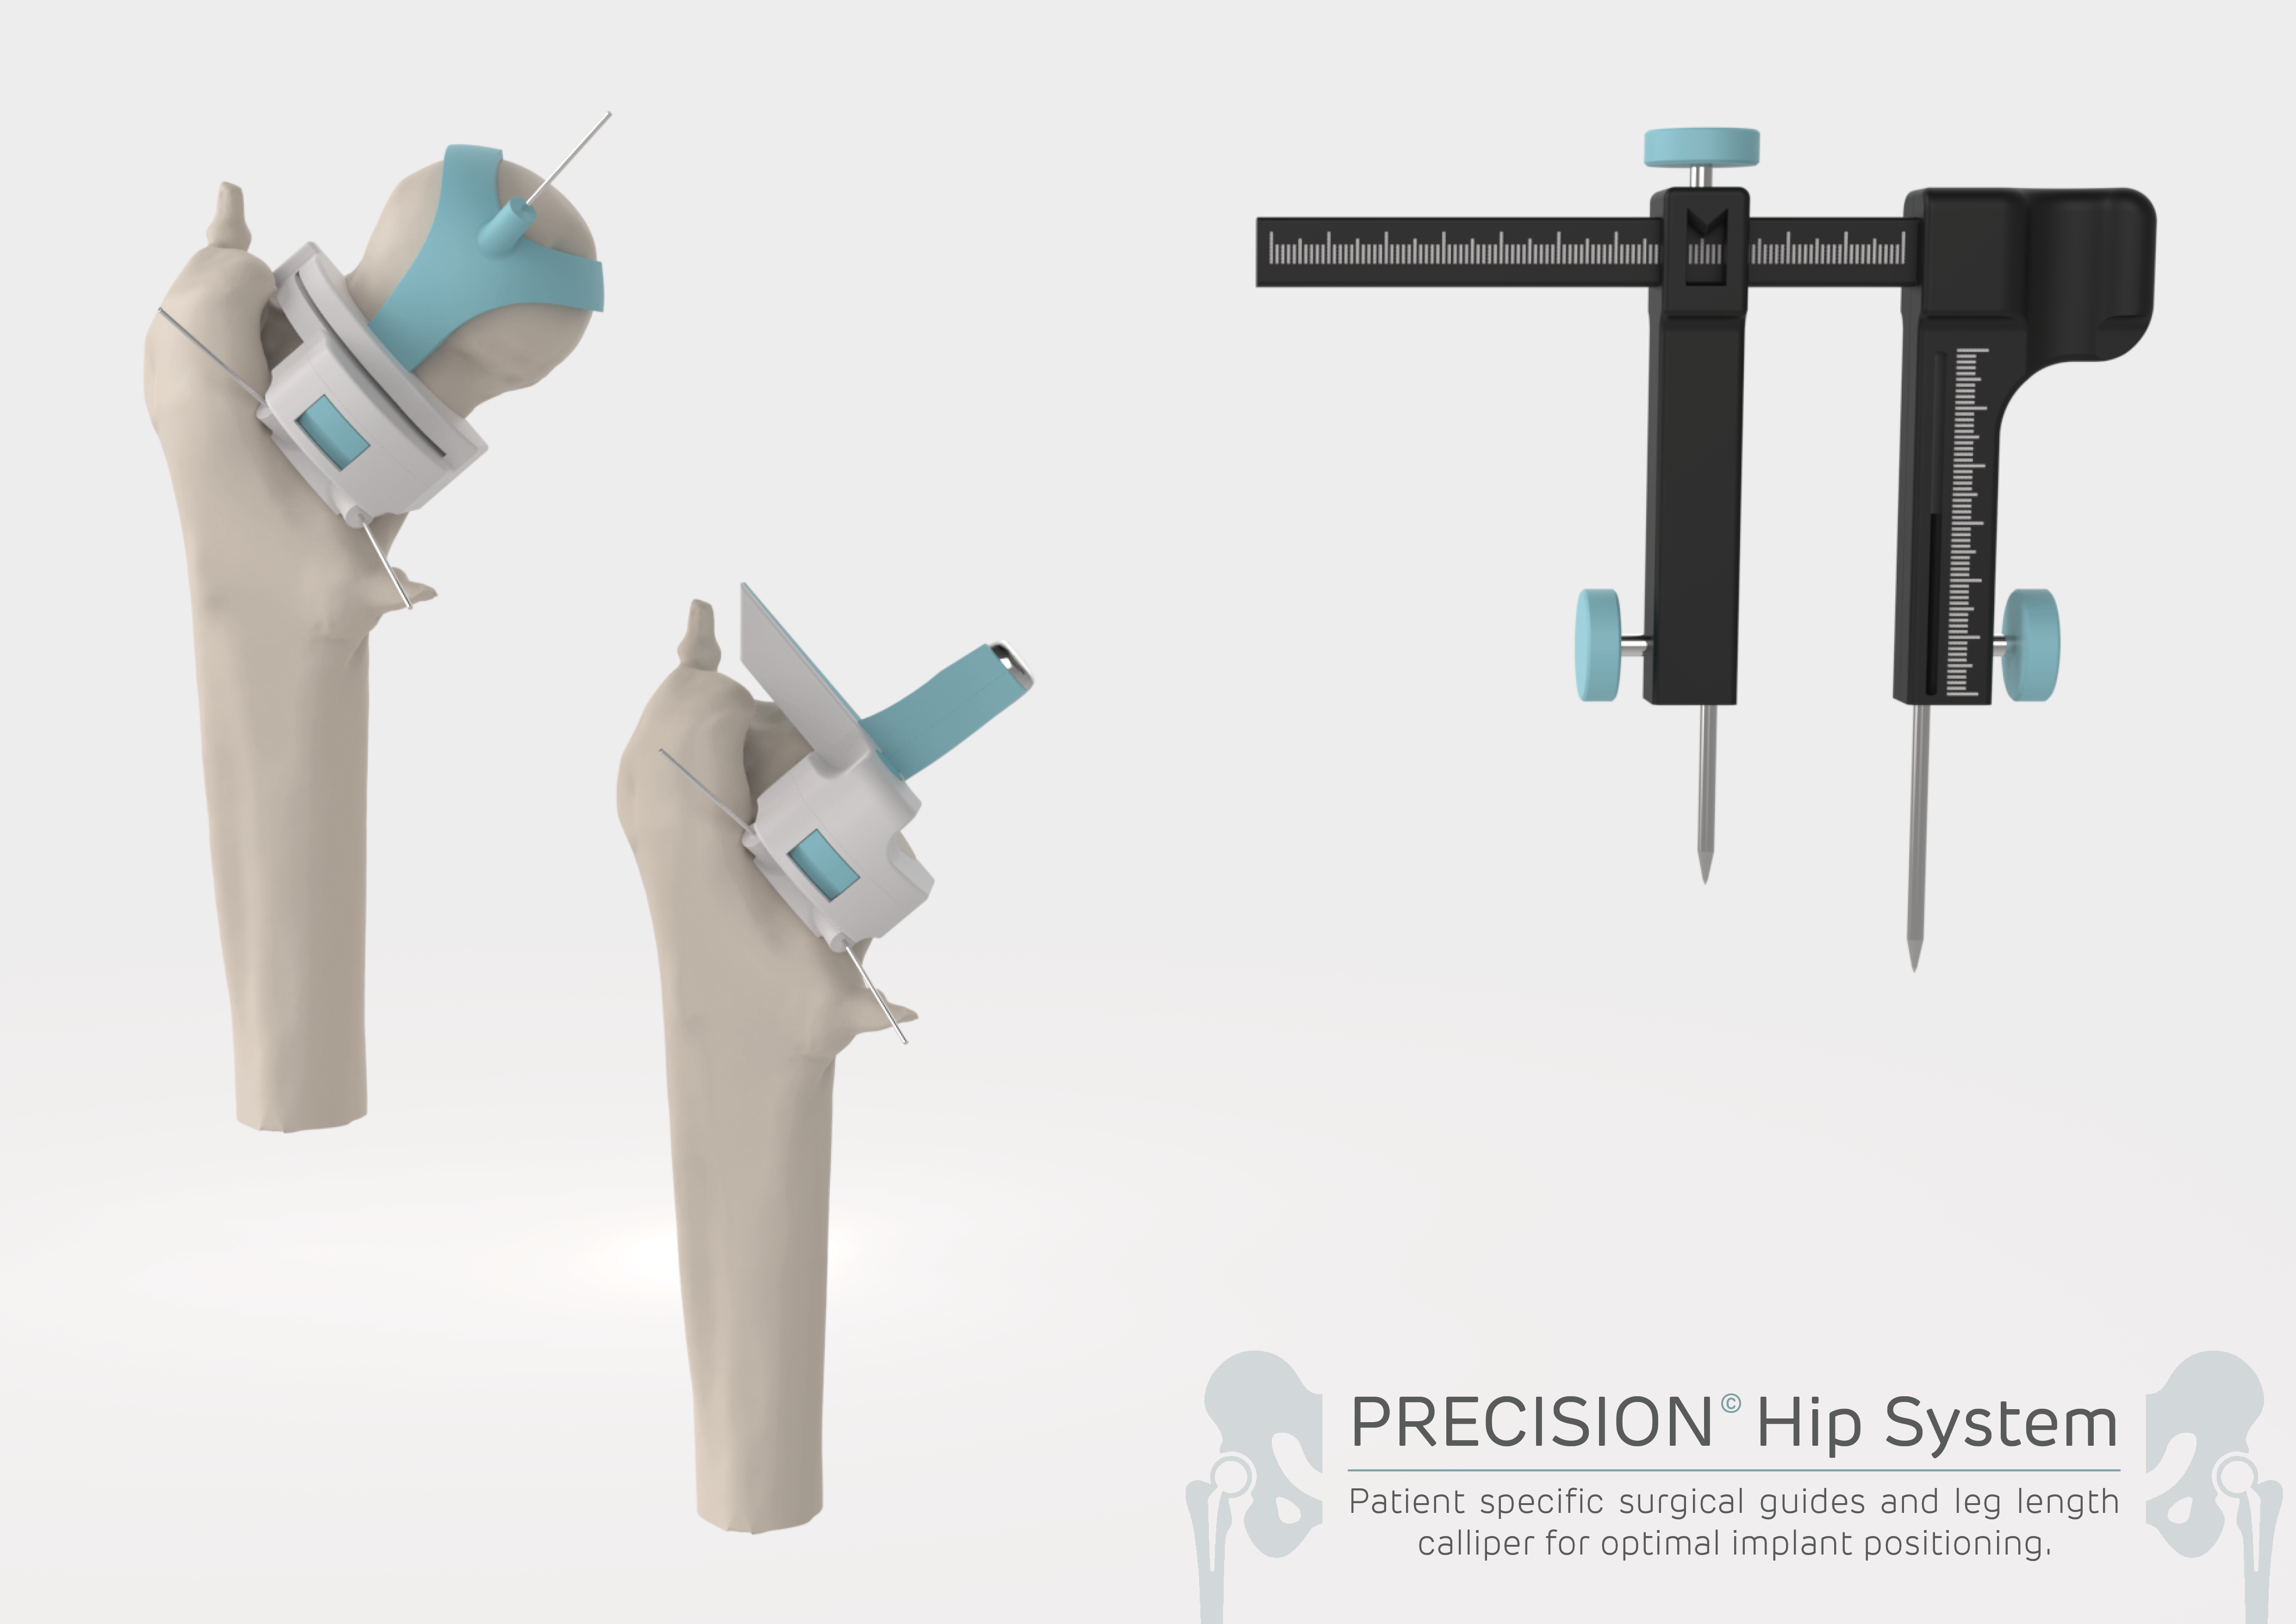
Implant positioning system to aid with accurate placement of the femoral implant to significantly reduce leg length discrepancies post hip replacement. There is a current lack of instruments and techniques available to surgeons for finding the correct position for the femoral implant during surgery and as a result leg length discrepancies are one of the most common complications following a hip replacement and are the largest cause for litigation against the orthopaedic community. To prevent these discrepancies, the PRECISION Hip System uses 3D printed patient specific surgical guides as well as a leg length calliper for checking measurements throughout the operation.
Femoral Neck Cut Guide
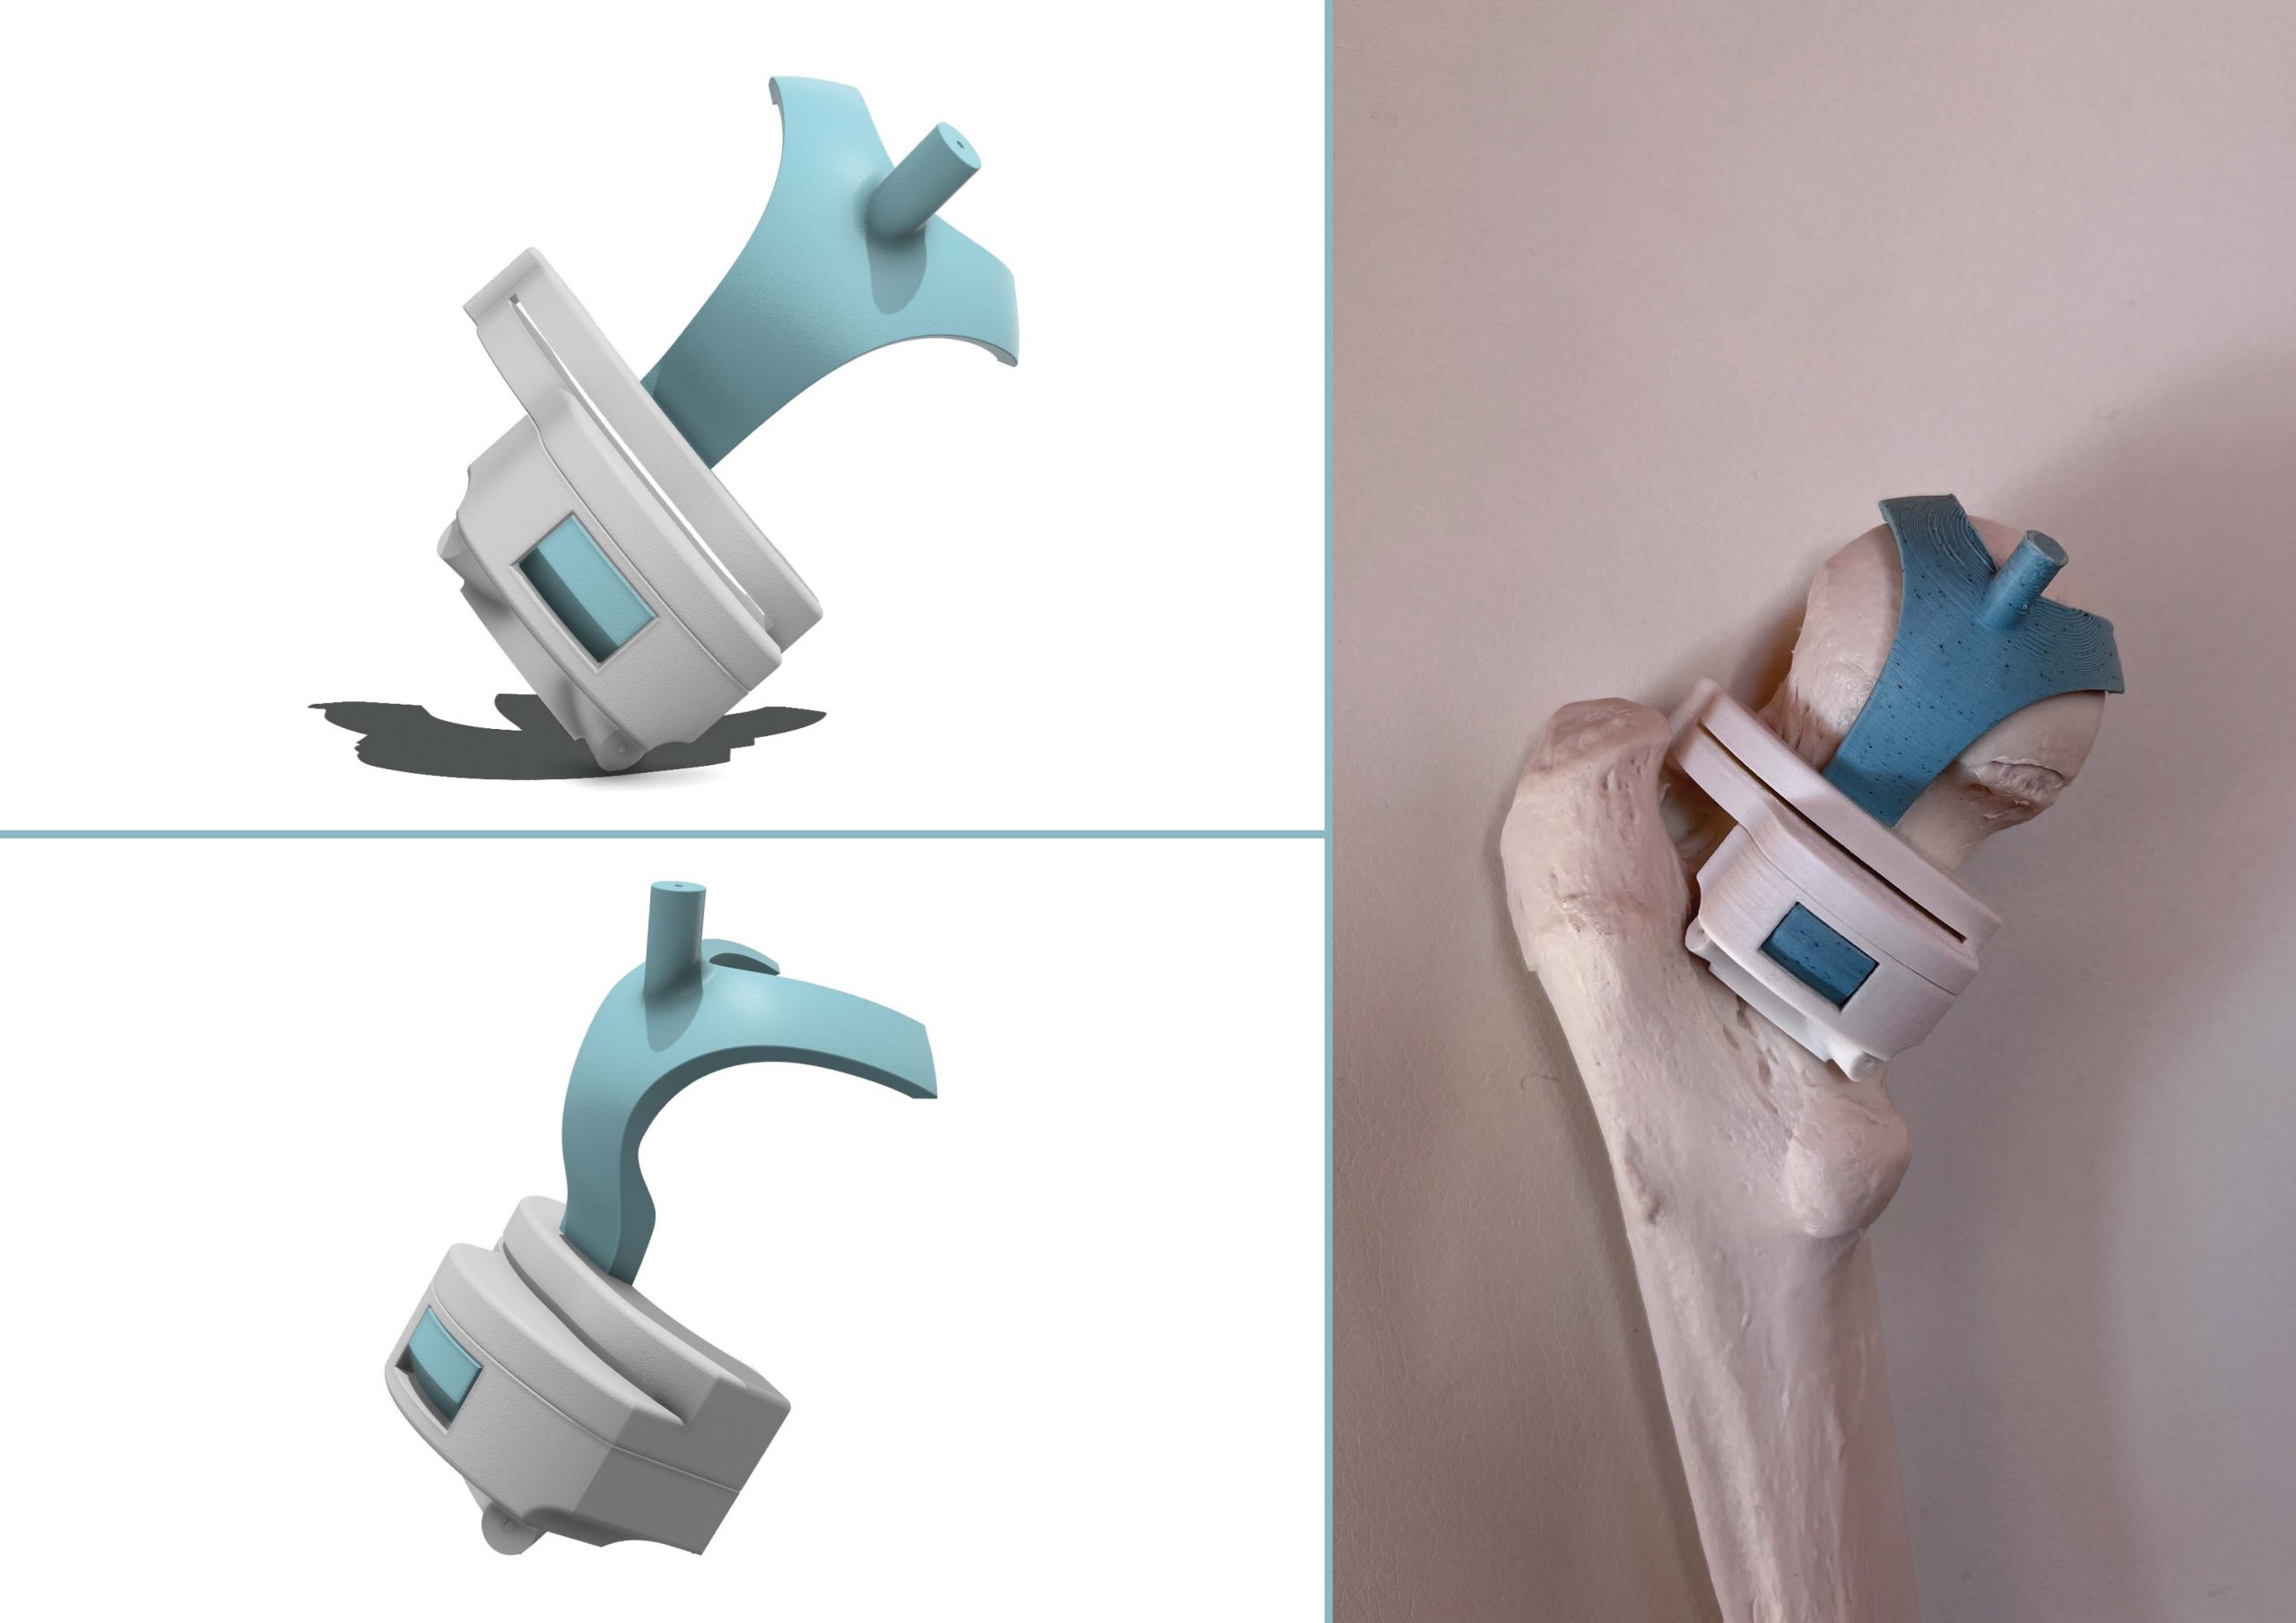
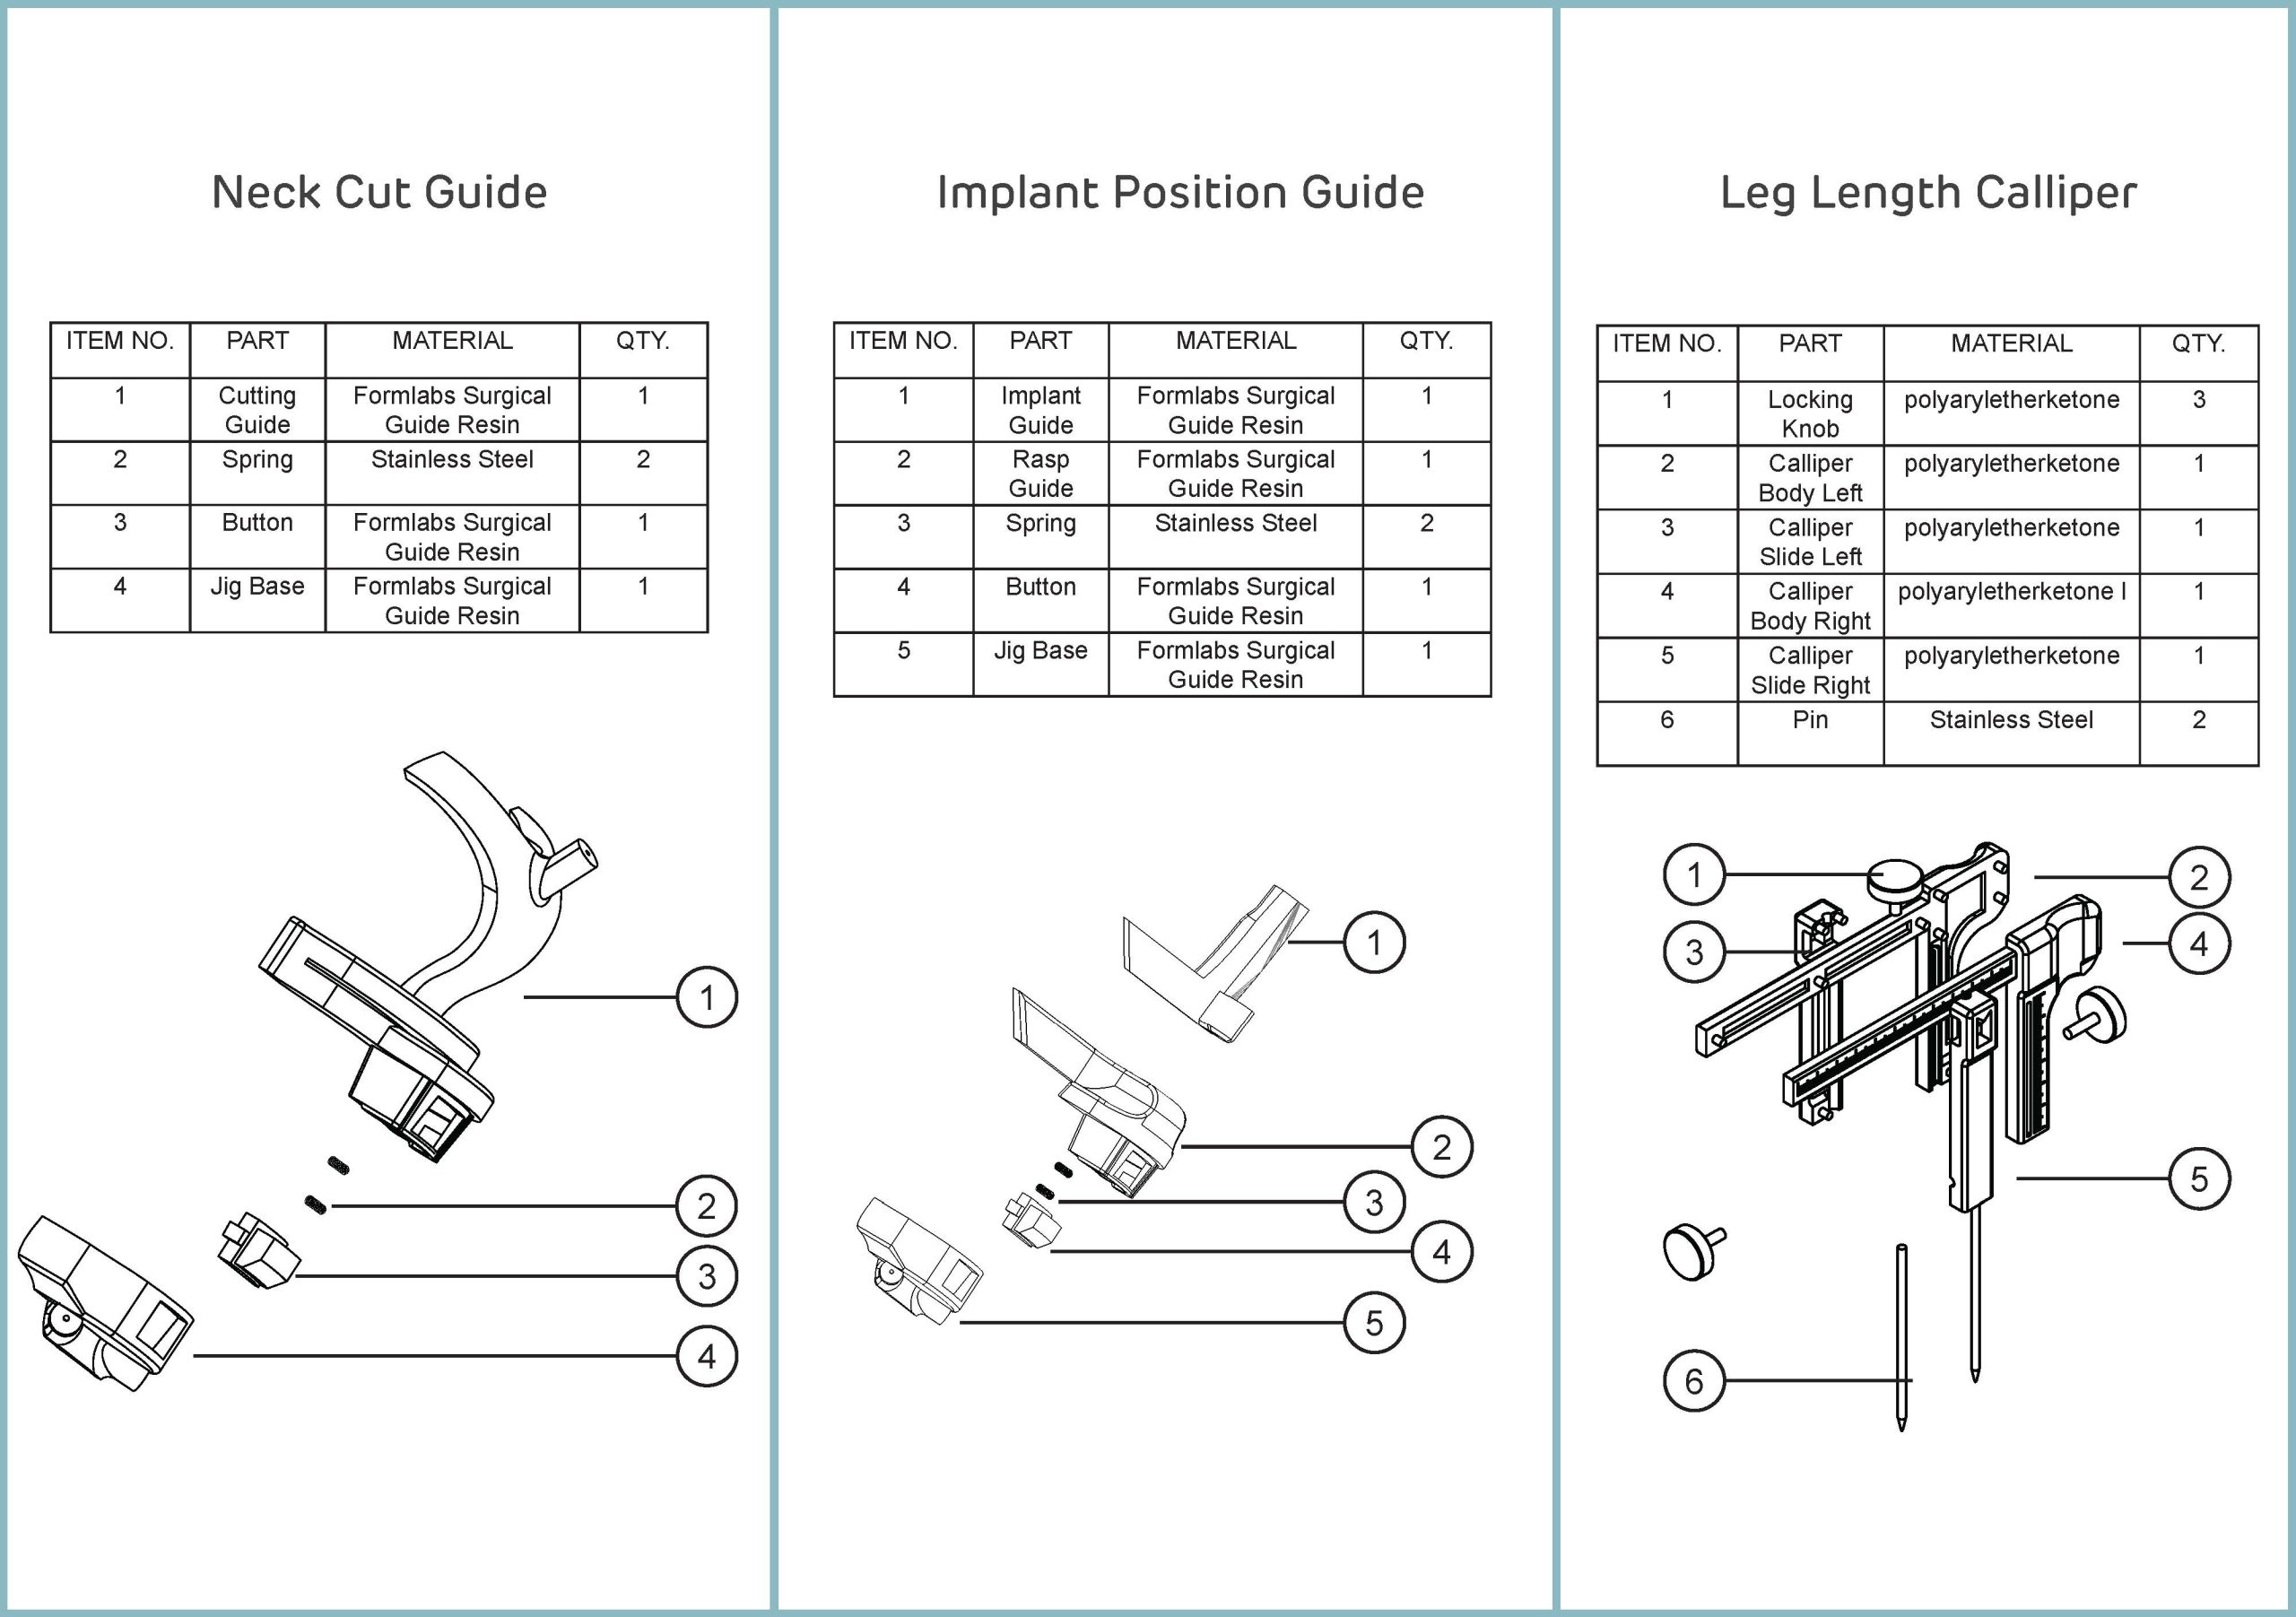
The first part of the system is the neck cut guide, this provides the surgeon with the exact height and orientation of the cutting plane. This is important as the height of the neck cut has a big influence on the final depth of the implant, if its cut too high then the implant will sit too high and vice versa. The "Y" shaped form of the guide provides both easy placement into its intended position as well as providing a contact surface large enough to ensure it only fits to the bone how it's intended without over use of material, helping to keep print times and material costs down.
Implant Position Guide
Following the cut of the femoral neck, the femoral head and neck cut guide is removed by pressing the release button in the base of the guide. It is the replaced with the Implant Position Guide which is used to ensure the implant is positioned correctly in all 6 degrees of freedom. Initially the rasp is lined up with the back of the guide and the femoral canal is cleared, the blue implant guide is then slotted in and the implant is lined up with the guide and lowered down into the femoral canal until it sits flush with the sides of the guide.
Leg Length Calliper
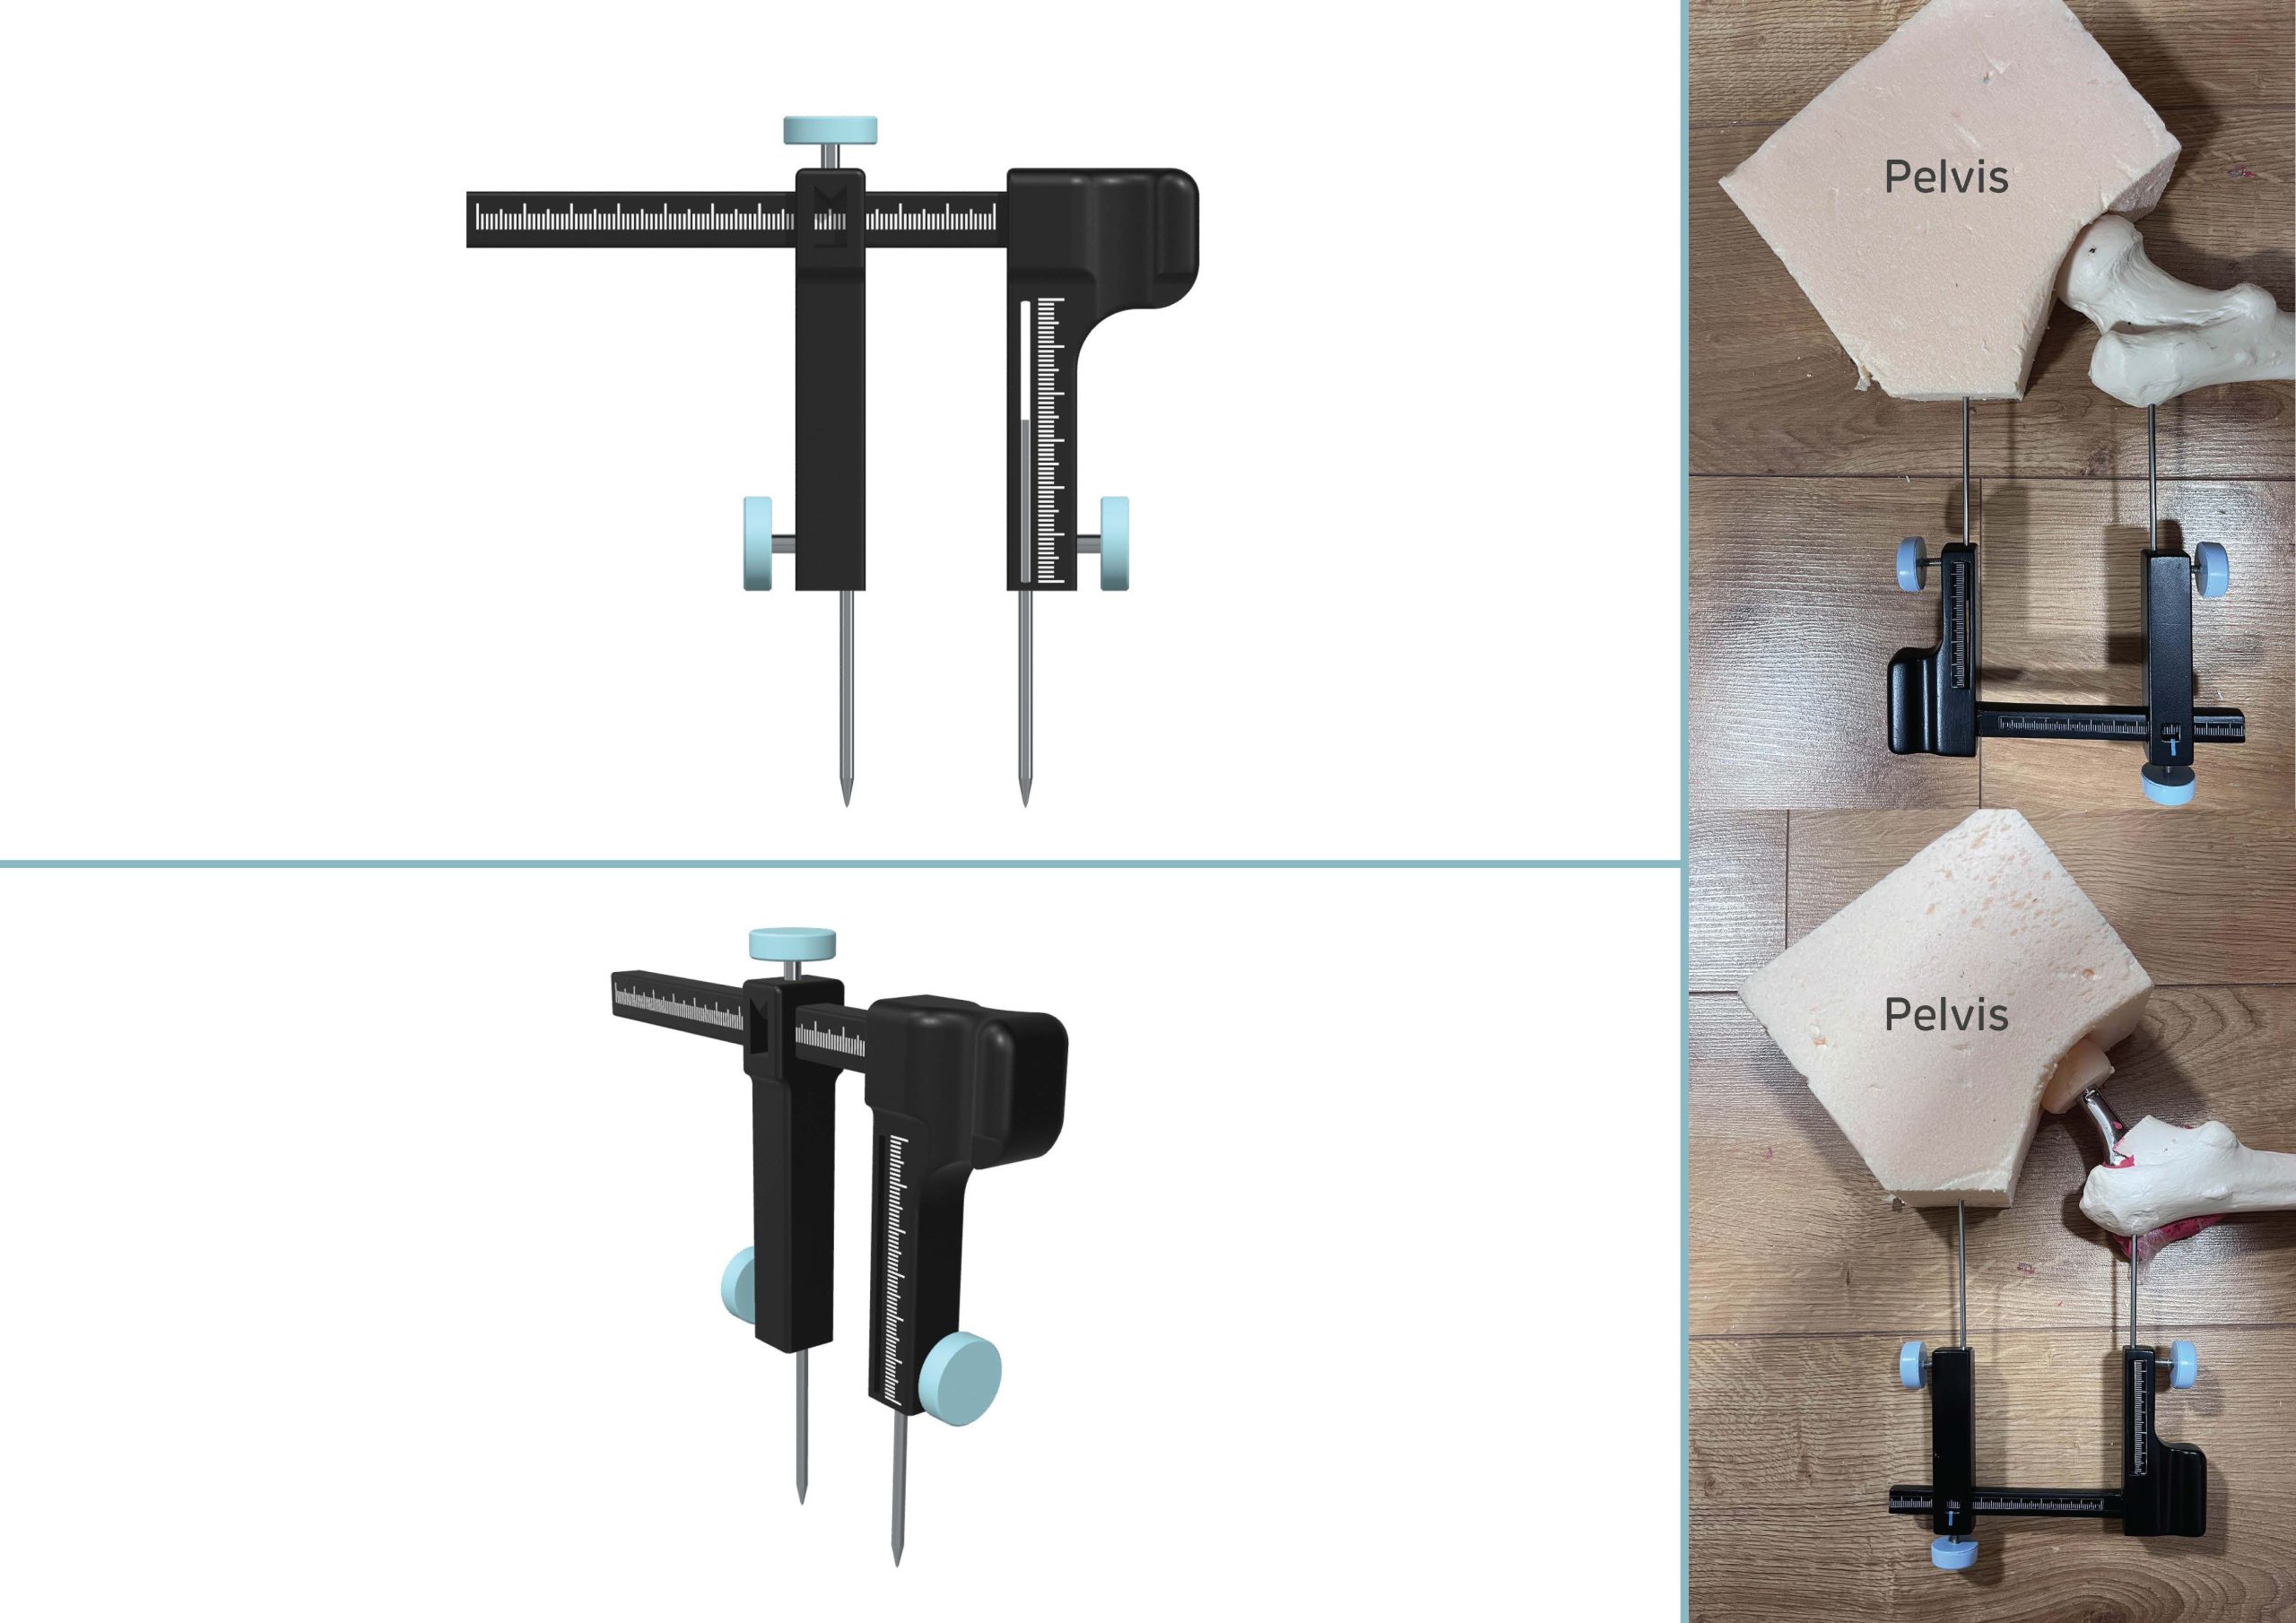
The system also consists of a leg length calliper which is used for checking leg length before and after the operation. By inserting a pin into the femur and one into the pelvis the calliper can be slid over the pins and the distance between can be measured. The calliper is removed but the pins are left in place as the operation is performed. At the end once the implant is positioned the calliper can be slid back onto the pins and the distance checked again, if the measurement remains the same it means no leg length discrepancy is present. The calliper can also be used throughout the operation for taking other measurements such as implant depth, this can be usefully during an emergency surgery for example where there was no time to create and print a jig.
Position Accuracy
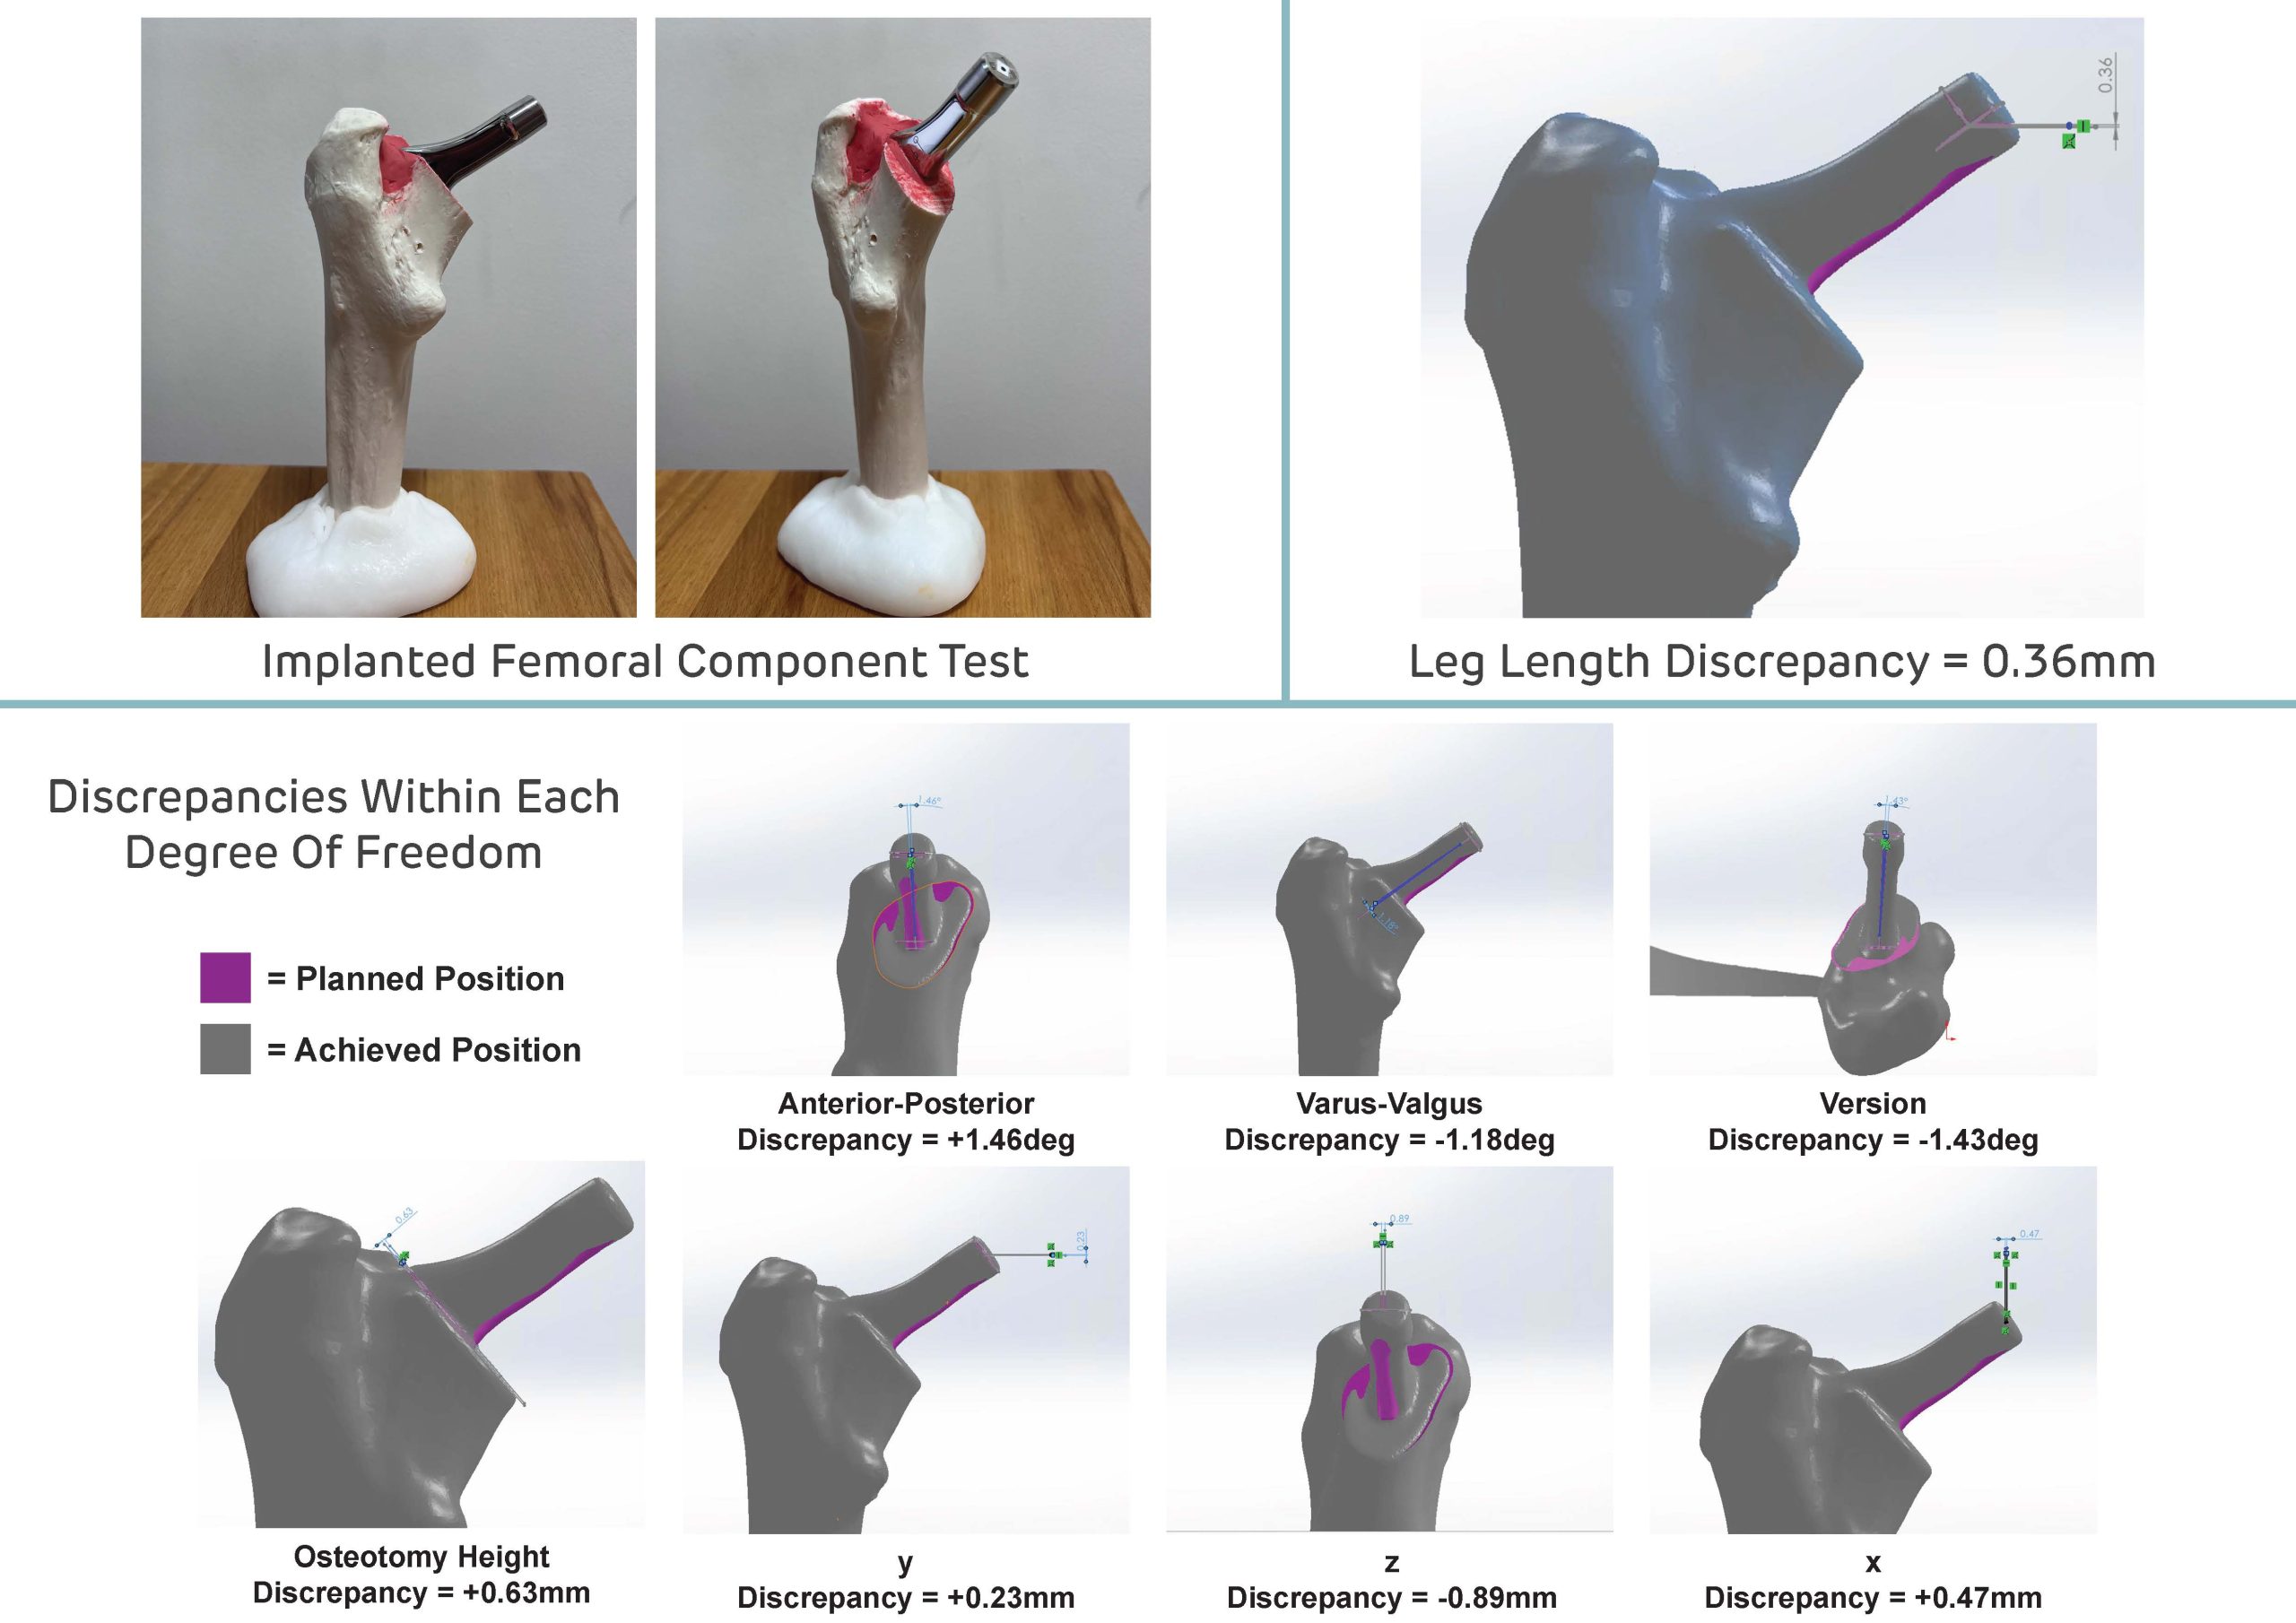
The jigs were prototyped using a model femur, the femur was 3D scanned a long with an implant allowing the scan meshes to be used for templating in Solidworks. This provided a planned position for the implant and the jigs could be created using this as reference. A simulated surgery was then performed using the 3D printed jigs and the implanted femur was then re-scanned allowing the achieved implant position to be compared with the planned position. The overall leg length discrepancy achieved using the jigs was 0.36mm (a discrepancy this low would not be perceived by the patient), this was a very promising result considering leg length discrepancies produced using the current methods range from 3mm to 70mm.
Prototype Test / Usage Scenario
Exploded Drawings
Thomas James Brew
Major project
Accurate Positioning Of The Femoral Prosthesis During Hip Replacement Surgery
